David's Astronomy Pages
Equipment
Telescope
Home
Page
Observatory
Use
David's Astronomy Pages
|
Telescope |
Home Page |
Observatory Use |
This page describes the telescope, camera and other equipment that I have used (I've attempted to include some practical points and learning that may be of use to others)
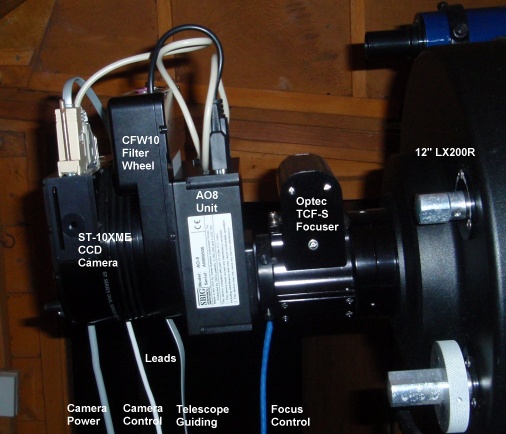
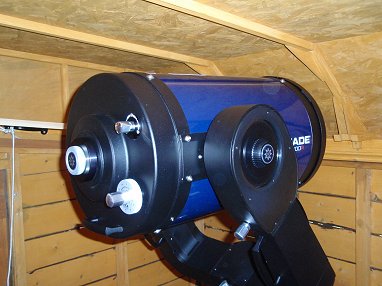
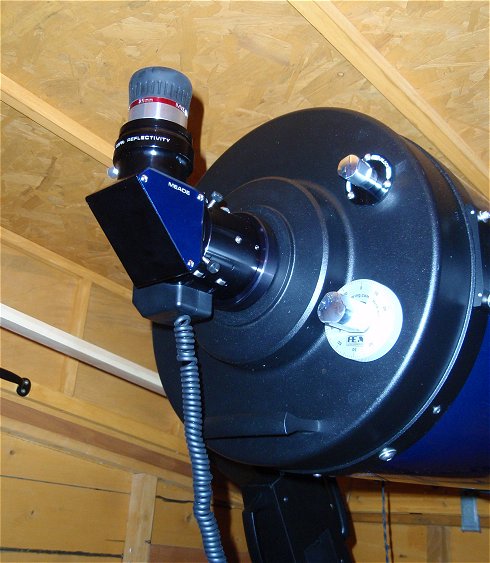
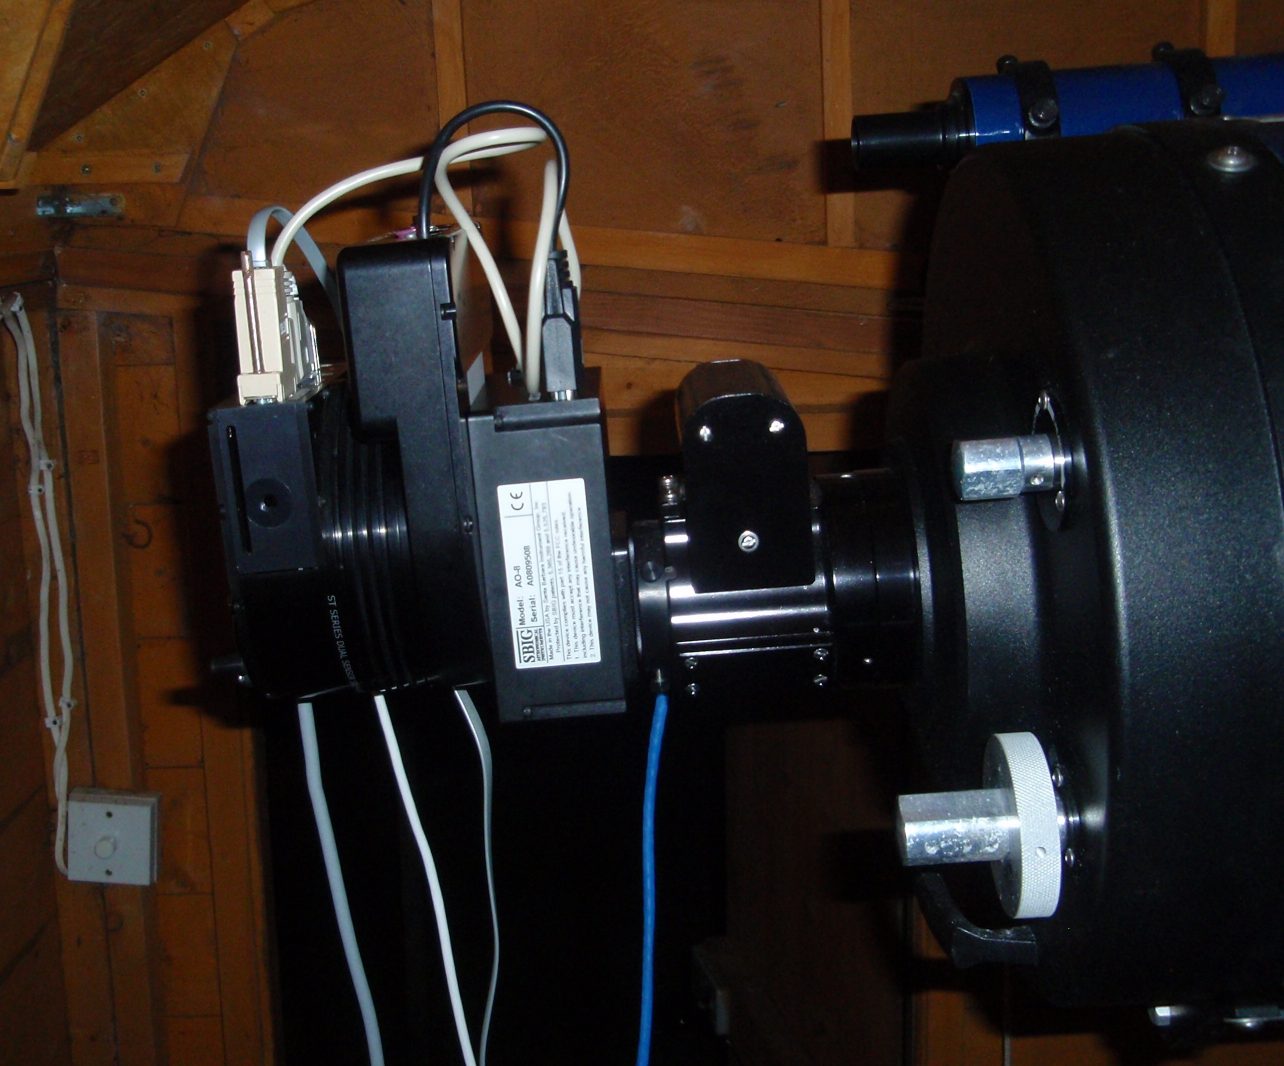
| 12" LX200R - with imaging equipment setup including AO-8 unit (Late 2013) |
|
| [Larger Image (not annotated)] |
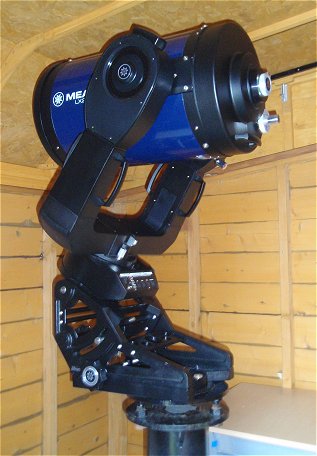
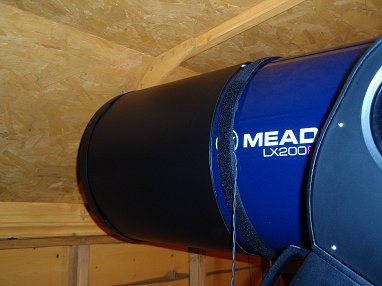
A new set of observing equipment was acquired in Jan/Feb 2009 to facilitate deeper and high resolution imaging. The equipment set is built around a Meade 12" LX200 ACF scope and a SBIG ST-10XME CCD camera.
The equipment builds strongly on the experience gained with my previous equipment over some 10 year+; a Meade 8" LX200 Classic scope (in use since 1995) and a SBIG ST-7e CCD camera (in use since 2001). The previous set of equipment has seen some very good service, but the time to upgrade has come. Of particular importance is the fact that the new equipment will be immediately compatible with my existing software control programs for controlling the scope and for imaging.
Meade 12" LX200 ACF(R) Telescope - a new larger scope with
x% larger aperture area and improved optics (UHTC coatings and ACF optics)
and a number of other smaller improvements over my 8" classic LX200
[more].
The scope will
be used with my existing Optec TCF-S focuser, instead of the scope's
standard microfocuser [more]
SBIG ST-10XME CCD Camera - with larger imaging and guiding chips
than the ST-7e model, and with higher quantum efficiency (QE).
and faster download times through USB interface (rather than older Parallel
connector) [more]
SBIG CFW10, Filter Wheel - a 10 position filter wheel allowing
full-time access to five extra filters compared to my previous filter wheel.
The CFW10 will enable to use by existing RGB, Moon and I Filters in the
same session as my usual main filter set (C, BVR and Star Analyser 100)
[more]
TAGOS Adapter Tube - to complement the new equipment a new adapter
tube has been added to permit a f6/3 focal reducer (Antares) to be
inserted within the focuser without adding any extra length to the imaging
train. The adapter tube reduces the length of my previous f/6.3 imaging
train by a full 3" (7.5 cm), with benefits for sky access and reducing
balance, sag and flat field issues [more].
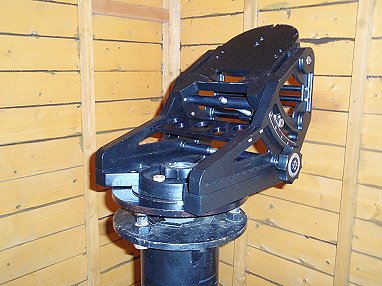
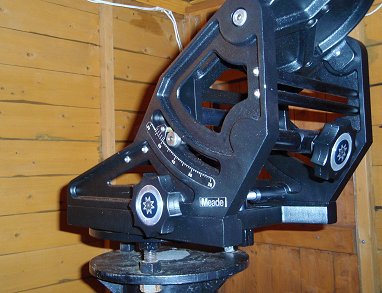
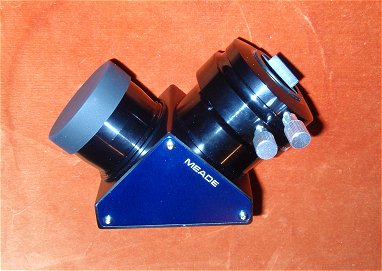
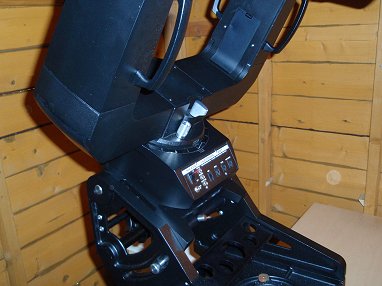
Meade UltraWedge - a more robust equatorial mount to accommodate
the larger telescope. The ultrawedge has improved controls for quicker/finer
polar alignment, [ more] . The new wedge required me to make engineering
modifications to the top plate of my existing pier and to rotate the pier
around by 180 degrees. Fortunately the latter operation, though tricky was
possible through the 12" x 12" hole in the observatory floor without
dismantling the observatory [more]
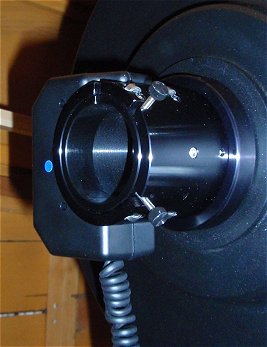
SBIG AO-8 Adaptive Optics - an AO-8 unit was also purchased to
form part of the new equipment suite in order to provide high resolution
imaging of selected on targets. The AO-8 unit wasn't added into the imaging
train until late 2013. This was after an extended period working with the
ST-10XME and CFW10 alone.
(more on AO8 unit)
Magnitude Limit and Resolution.
Overall the combination
of larger aperture, UHTC coatings and higher QE will enable either deeper images
for the same exposure time or shorter exposures for the same S/N.
Whilst the small pixels of the ST-10XME (5.7 microns) are probably too small
for the focal length of the 12" scope and my local seeing conditions (typical
around 4.5 arc sec FWHM), even with f6.3 focal reducer, there will be certain
targets for which oversampling will be helpful whilst for other targets the
2x2 and 3x3 binning options will provide better pixel sizing whilst still preserving
a relatively larger image size
Sky Access
The combination of new taller telescope and lower tops
to the southern and northern observatory walls will enable me to have improved
access to low declination / lower inclination targets. The new setup should
enable me to reach down to 5 deg inclination in the southern sky which at my
latitude will enable me to see down to declination -27 deg on clear nights.
[ my previous setup had a southern limit of around -17 deg declination
]
Improved access to stars at high declination should
be gained from the combination of slightly larger swing through distance with
the 12" scope and use of the TAGOS Adapter tube. I should be able
to observe to around declination +75 deg with my normal f6.3 setup compared
to a limit of +58 deg with my previous setup. This previous limit
had become significantly constrained in 2008 after adding my Optec TCF-S focuser
which has longer than my previous JMI focuser [more]
With the slightly
larger swing through room with the 12" LX200 scope it is possible for me
to use an alternative session setup of using the Meade microfocuser , and 2"
right angle mirror to reach targets as far north as +90 deg declination (ie
the Pole Star). This would probably be without using a f6.3 focal reducer,
but the larger imaging chip size in the ST-10XME will mean that resulting FOV
should still be sufficient for most target acquisition/imaging.
This setup using ST-10XME with a right hand mirror hasn't be tried yet.
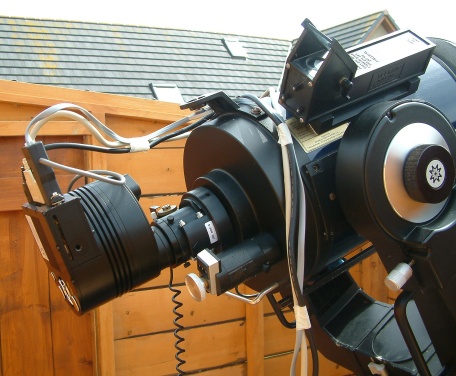
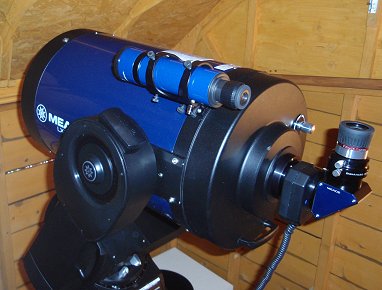
| 12" LX200R - with imaging equipment setup (2009) | 12" LX200R - with imaging equipment setup (annotated) | |
|
|
|
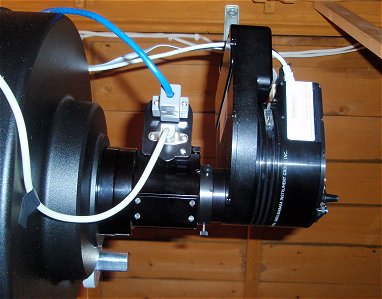
After laying in its box since 2009 the AO-8 adaptive unit was finally added into the imaging train in late 2013. The setup was changed 2013-11-16 (between sessions 554 and 555).
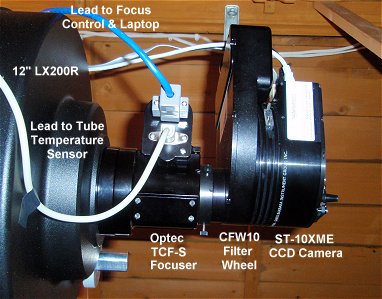
| 12" LX200R - with imaging equipment setup including AO-8 unit (Late 2013) |
|
|
| [Larger Image (not annotated)] |
Besides the addition of AO-8 unit the back plate of the CCD camera was reinserted
to increase the distance between the ST-10XME's CCD and the Filter Wheel with
Star Analyser 100 diffraction grating. Whilst this adds an additional
window into the train, the aim is to increase Dispersion Value (& Plate
Scale) when taking Spectra.
Back to Top
In 2001 I purchased my first CCD camera - a SBIG ST-7e, adding a filter wheel
in 2004 and a new focuser (an Optec TCF-S) in 2008. I began using Filter
Wheel with RGB (colour) and Clear filters in 2004, moving to BVRI (photometric)
and Clear filters in 2005. In 2008 the I (infrared) filter was swapped
out for a Star Analyser 100 diffraction grating in order to experiment with
low resolution spectrographic work
By end of 2008 my standard imaging
setup comprised
Meade 8" LX200 Classic (f/10) Telescope - a standard LX200,
normally operated with a Meade f6.3 focal reducer. [more]
SBIG ST-7e - parallel port version 765 x 510 pixels, 9 micron
pixel size, normally operated [more]
SBIG CFW8 filter wheel - a 5 position filter wheel normally operated
with BVRI (photometric) and Clear filters or BVR, Clear & 'Spectra'
filters [more]
Optec TCF-S focuser - a digitally controlled, temperature compensating focuser with repeatable focus positions. 7000 steps. Added in 2008. [more]
| 8" LX200 Telescope with ST-7 CCD camera (2006) |
 |
Back to Top
I purchased my first serious telescope - a Meade 8" LX200 Classic - in 1995 and used it for visual observing until 2001 at which point I began using it for CCD Imaging. A Telrad Sight was added in 1996. with a JMI focuser being added to the set up in 1999.
By the end of 2000 my normal equipment set comprised
Meade 8" LX200 Classic (f/10) Telescope - a standard LX200
SCT operated with/without a Meade f6.3 focal reducer. [more]
Meade Standard Equatorial Wedge - [more]
JMI NGF-S focuser. - [more]
Meade 1.1/4" diagonal - [more]
Various Meade 4000 eyepieces, Barlow- [more]
Various Filters - Moon, Red, Green, Blue, Yellow filters for visual
observing - [more]
Back to Top
|
Year / Session : |
2013 | 2009 | 2009 | 2008 | 2008 | 2007 | 2001 | ||
| S455+ | S356+ | S356+ | S290-S350 | S150-S289 | |||||
| Equipment | |||||||||
| Telescope | Meade 12" LX200 ACF UHTC |
Meade 12" LX200 ACF UHTC |
Meade 12" LX200 ACF UHTC |
Meade 8" LX200 Classic |
Meade 8" LX200 Classic |
Meade 8" LX200 Classic |
|||
| Focuser | Optec TCF-S |
Optec TCF-S |
Optec TCF-S |
Optec TCF-S |
JMI NGF-S |
Main Focuser |
|||
| Reducer | Antares F 6.3 focal reducer |
Meade F 6.3 focal reducer |
Meade 6.3 Focal reducer |
often none | |||||
| Adapter | T.AGOS universal adapter |
Adapter(s) | Adapter | Visual Back, 1.1/4" Diagnoal | |||||
| Adaptive Optics | AO-8 | ||||||||
| Filter Wheel | CFW10 (10) | CFW10 (10) | CFW10 (10) | CFW8A (5) | CFW8A (5) | - | |||
| Camera | SBIG ST-10XME |
SBIG ST-10XME |
SBIG ST-10XME |
SBIG ST-7e |
SBIG ST-7e |
Visual Observing [3] |
|||
| Aperture | 305 mm (12") | 305 mm (12") | 305 mm (12") | 203 mm (8") | 203 mm (8") | 203 mm (8") | |||
| Focal Length: | 3170 mm | 2960 mm | 1725 mm | 1260 mm | 2000 mm | ||||
| Focal Ratio: | f/10.4 | f/9.7 | f/5.7 | f/7.4 | f/10 | ||||
| FOV (arc mins) | 16.1' x 10.9' | 17.2' x 11.6' | 29.4' x 19.8' | 13' x 6.5' | 60' with 25mm eyepiece |
||||
| Plate Scale (1x1) | 0.443 "/px | 0.472 "/px | 0.808 "/px | 1.23 "/px | 1.23 "/px | n/a | |||
| Plate Scale (2x2) | 0.886 "/px | 0.944 "/px | 1.616 "/px | 2.46 "/px | 2.46 "/px | n/a | |||
| Plate Scale (3x3) | 1.330 "/px | 1.416 "/px | 2.424 "/px | not used | not used | n/a | |||
| Main Filters | CBVRI, Ha, GB, S, U | CBVRI, Ha, GB, S, U | CBVRI, RGB, S, Moon | CBVRS [2] | C BVRI | B, V. R, Moon | |||
| Telescope Use | Photometry & Deep Sky (2x2 binning, 3x3 binning) Planetary (1x1 binning) |
Photometry & Deep Sky (2x2 binning, 3x3 binning) Planetary (1x1 binning) |
Photometry & Deep Sky (2x2 binning, 3x3 binning) Planetary (1x1 binning) |
Photometry & Deep Sky (2x2 binning) Astrometry (1x1 binning) |
Photometry & Deep Sky |
Visual Observing |
|||
| Pier/Tripod | Pier + Wedge |
Pier + Wedge |
Pier + Wedge |
Pier + Wedge |
Tripod + Wedge |
Tripod + Alt Az |
|||
| Observing Sessions | |||||||||
| Telescope Hours | |||||||||
| Notes | 1 | 1 | 2,3 |
Notes:
1) Telescope hours/ number of sessions to date:
2) Filter S = Star Analyser
100
3) Occasional use of Pentax SLR at prime focus or with eyepiece projection
Mechanical Back Focus Lengths
(1) From CCD to rim of ST camera body,
, excluding front plate = .492 inches (12.5mm)
(2) From CCD to exterior
surface of the camera front plate, excluding D block = .742 inches (18.8mm)
*
(3) With CFW8A attached to camera's front plate = 1.74" (44.2mm) for
new cameras, or 1.69" (42.9mm) for
older cameras
Back to Top
Back to Top
Back to Top
Back to Top
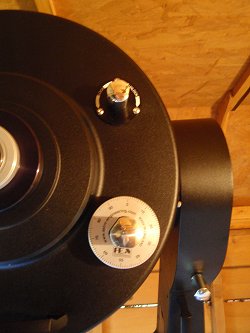
| Meade Ultra-Wedge sitting on pier | Ultra-Wedge showing Az. Adjustment Knob | |
 |
 |
|
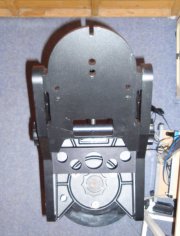
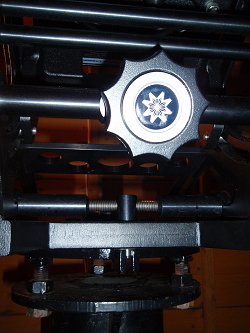
| Ultra-Wedge top view | Ultra-Wedge showing Dec. Adjustment Knob | |
 |
 |
|
Back to Top
Back to Top
In the LX200 Classic lights first passes through a thin lens with 2-sided aspheric correction (“correcting plate”), proceeds to a spherical primary mirror, and then to a convex aspheric secondary mirror. The convex secondary mirror multiplies the effective focal length of the primary mirror and results in a focus at the focal plane, with light passing through a central perforation in the primary mirror.
The 8" f/10 model has a focal length of 2000mm and theoretical resolution is 0.56 arc sec.The 8" model uses an oversize 8.25" primary mirror which produces higher off-axis illumination than a standard sized mirror.
Links: | Meade.com
|
LX200 (Classic) Manual |
Tips: |
MAPUG Archives
(Meade Advanced Product User Group). |
Doc G's Information
Site |
Back to Top
The LX200R (ACF) is a new LX model from Meade which uses a spherical primary
mirror, a special full-aperture corrector lens and a hyperbolic secondary mirror
in order to produce a coma-free flat field of field, that also corrects for
astigmatism. The ACF design is advertised by Meade as "producing
a coma-free, flat field of view that rivals traditional RC telescopes at a fraction
of the cost". The scope builds on improvements already made to the LX200
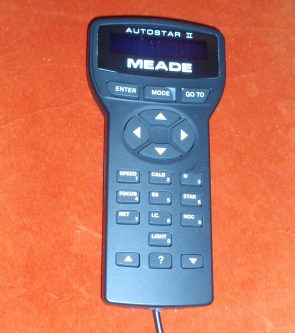
as part of the LX200GPS range including Primary Mirror Lock, Zero Image-Shift
Microfocuser, SmartDrive™;, Smart Mount™, and AutoStar® II
and GPS.
The 12" model has a focal length of 3048mm and a theoretical
resolution of 0.375 arc sec.
More Notes on 12" LX200R Telescope
Links: | Meade.com
| LX200 ACF |
LX200R Manual |
Groups: |
LX200R yahoo group
| LX200GPS yahoo group
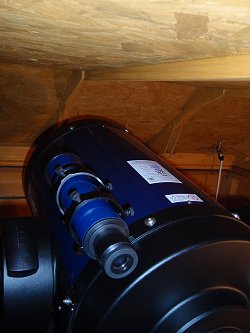
| 12" LX200R Scope in Observatory | ||
 |
 |
|
Back to Top
| Scope | 8" LX200 Classic | 12" LX200R (ACF) |
| (1995-2008) | (2009+) | |
| Clear Aperture Diameter | 203 mm (8") | 305mm (12") |
| Primary Mirror Diameter | 209.6 mm (8.25") | ? |
| Focal Ratio | f/10 | f/10 |
| Focal Length | 2000 mm | 3048 mm |
| Coatings | Standard Coatings |
Ultra-High-Transmission Coatings (UHTC) |
| Optical Tube Size | 9.1" Dia. x 16" Long | 13.6" Dia. x 25" Long |
| Theoretical Resolution | 0.56 arc sec | 0.375 arc sec |
| Gears | 5.75" worm drives | 5.75" worm drives |
| Periodic Error Correction | Yes, RA Drive | Yes, Both axes |
| Primary Mirror Lock | No | Yes |
| Net Weight (Telescope) | 37 lbs ? 73 lbs |
73 lbs ?125 lbs |
| Telescope Mounting | Heavy-Duty Fork-Type | Heavy-Duty Fork-Type |
| Supplier | BC&F (1995) Telescope House |
Pulsar Optical |
| Equatorial Wedge | Standard Wedge 9 lbs |
Ultrawedge 29 lbs |
Back to Top
The LX200 telescope inherently suffers from image shift when its own focuser is used. It is worse on some LX200s than others. The amount of shift was initially very bad on the scope when I bought it. Even after the telescope went off for adjustment back at BCF it still displayed some image shifting through not as much as before. In the end I decided I would get a JMI NGF-S focuser and it proved to eliminate most of the image shift problems that was experiencing.
The JMI NGF-S focuser screws to the visual back of the scope and button controls a little handset (which contains a battery) is used to move the focuser and attached diagonal & eyepieces back and forth. The focuser is perfect for getting the very best focus whilst having the object/star stay rock solid in the centre of the eyepiece.
The JMI focusing range is limited however and the main LX200 focuser still needed to be used when changing optics and even when swapping between 26mm eyepiece and my 9mm illuminated reticule eyepiece.
Use of the JMI NGF-S Focusser on an 8" LX200, requires use of 1.1/4" diagonal if access to sky areas above Dec 74 deg N is needed - as a 2" diagonal will hit the telescope stand if an attempt is made to slew to Polaris with the focuser installed.
The JMI NGG-S model is now discontinued. The current near-equivalent models are a) EV-1cM and b) NGF-XTcM
Links: | JMI (Jim's Mobile Incorporated) | Reviews | NGF Focusers, S&T 1994 |
Back to Top
I acquired a Digital Focus Counter in 2001 with the aim of making mirror
focusing easier when changing equipment (e.g. eyepiece to ST7). Initially
it didn't work, since the DFC tends to slip on the LX200 focus knob (This is
in part related to the stiffness on the mirror focus knob which as been stiff
since 1996 when I had the mirror focus adjusted to help reduce image shift).
I subsequently put in a grub screw to form a stronger connection between the
DFC and the Meade Focus knob. This fix has been reasonably satisfactory for
several years, however after my focus knob became difficult to move and I was
unable to get the DFC to move the focuser I was forced to remove the DFC device,
Due to a the grub screw slipping round, I was forced to 'cut' the DFC off the
SCT focus knob, in a way that it couldn't be subsequently removed.
Links : | JMI Digital Focus
Counters | Picture
|
Back to Top
Links : | Optec | Optec TCF-S Product Page | TCF-S Technical Manual |
| 12" LX200R - with Mirror Lock , Manual Focusing Knob | 12" LX200R - with imaging equipment setup (annotated) | |
|
|
|
Back to Top
| 12" LX200R - with Meade MicroFocuser |
|
Back to Top
My first CCD camera was a SBIG ST-7e Dual CCD/Self Guiding Camera purchased
in September 2001. It is a Parallel version of the ST-7 series of mid size cameras
and uses the KAF-401E CCD and TC-211 Guide CCD. The camera is an ABG version.
The camera was mainly operated in 2x2 binning for Photometric Work and Deep
Sky Imaging (382 x 255 pixel images), whilst the native 1x1 binning was used
for Astrometric Work and Planetary/Lunar Imaging (765 x 510 pixel images).
The self guiding capability of the camera was rarely used due its relatively
small size and associated difficulty of finding suitable guide stars (particularly
during automated operation)
ST-7 models have evolved with time, the current Sales version is the ST-7ME USB version with TC-237 Guide CCD, but the size of the imaging CCD and principal attributes have remained largely the same).
Links | SBIG | ST-7 Current Version (ST-7ME) | User Groups/Forums : | SBIG yahoo group |
Kodak KAF-401 E performance specification (June 2000) (copy at http://www.lancs.ac.uk/depts/spc/resources/observatory/kaf-0401e.pdf )
Back to Top
The Model ST-10XME is the flagship of the "ST" series of self-guiding
CCD cameras from SBIG. The body is similar to that of my older ST-7e, but it
has a larger and more superior CCD with lower dark current, lower read noise
and higher quantum efficiency (QE). It also has a larger guide chip and a faster
computer interface (using USB interface instead of older Parallel connection
- up to 14 times faster). Cooling is more efficient allowing the camera to reach
-35 degC below ambient instead of -30 degC with my older ST-7e camera.
[Note the previous ST-10 model - ST-10XE - used the KAF- 3200E Image Sensor
and had a peak QE of 65%. This compares with the new ST-10XME model which
uses the KAF- 3200XM sensor and has a peak QE of 85%. The new sensor is the
same CCD as the KAF-3200E with the exception of the addition of micro lenses
over the pixels.]
Links: | SBIG |
ST-10 Product Page
| ST-10XE/ST-10XME
CCD Imaging Camera | User Groups/Forums : |
SBIG yahoo group |
ST-10XE / ST-10XME Information |
KAF 3200ME Specification (Kodak)
Properties
of the KAF-3200ME Image Sensor (by Richard Berry)
Testing
QSI's 532ws Scientific CCD Camera (also uses the KAF-3200ME) ( by Richard Berry)
| ST10-XME CCD Placement |
|
| At Image Scale of 0.443 "/px (1.329 3x3) the
Centre to Centre distance between Imaging and Guide CCD is 9.98 arc min |
Back to Top
| Camera | SBIG ST-7e (Parallel Model) |
SBIG ST-10XME |
| (2001-2008) | (2009+) | |
| Imaging CCD | KAF-401E | KAF-3200ME |
| Pixel Array | 765 x 510 pixels | 2184 x 1472 pixels |
| CCD Size | 6.9 x 4.6 mm | 14.9 x 10 mm |
| Total Pixels | 390,000 | 3.2 million |
| Pixel Size | 9 x 9 microns | 6.8 x 6.8 microns |
| Well Capacity | 50,000 e- (ABG) | 77,000 e- |
| QE (peak) | 60% | 85%, micro lens |
| A/D Convertor | 16 bit | 16 bit |
| A/D Gain | 2.3e-/ADU | 1.3e-/ADU 1.5e-/ADU |
| Read Noise | 15e¯ RMS | 8.8e¯ RMS |
| Dark Current | 0.5e-/pixel/sec at 0 deg C | |
| Binning Modes | 1 x 1, 2 x 2, 3 x 3 | 1 x 1, 2 x 2, 3 x 3 |
| Shutter | Electromechanical | Electromechanical |
| Exposure | 0.11 to 3600 seconds | 0.12 to 3600 seconds |
| Cooling | Single Stage Thermoelectric, Active Fan, Water Assist Option |
Single Stage Thermoelectric, Active Fan, Water Assist Option |
| Cooling below Ambient | -30 degC (w/air) | - 35 degC (w/air) |
| Computer Interface | Parallel | USB 1.1 |
| Guiding Chip | Dual CCD Self-Guiding with built-in TC-211 CCD 192 x 164 pixels 15 x 15 u 2.6 x 2.6 mm |
Dual CCD Self-Guiding with built-in TC-237 CCD 657 x 495 pixels 7.4 x 7.4 u 4.9 x 3.7 mm |
| Weight | 0.9 kg | 0.9 kg |
| Backfocus | ~ 0.92 inches / 2.3 cm | 0.92 inches / 2.3 cm |
| Supplier | BC&F (2001) |
Ian King Imaging (Jan 2009) Ian King Imaging |
Back to Top
The CFW8A model is now discontinued. The current equivalent model is the
CFW9
Links |
SBIG | CFW9 Product
Page |
Back to Top
2009-2010 CFW10 (10 position)
Back to Top
| Camera | SBIG CFW8A | SBIG CFW10 |
| (2004-2008) | (2009+) | |
| Filter Positions | 5 | 10 |
| Filter Size | 1.25" | 1.25" |
| Weight | 14.7 oz | 2lb (0.9 kg) |
| Backfocus | 1.0 inches (2.54 cm) | 0.6 inches / 2.3 cm (when attached in lieu of the camera's face plate, otherwise 0.75") |
| Supplier | SBIG / SBIG (model now discontinued) |
Ian King Imaging (Jan 2009) Ian King Imaging |
Back to Top
I have Orion Set 1 of Colour Filters (1.1/4"). Contains 4 colour filters. I used them occasionally when looking at Planets, when they can help increase the contrast between different surface or atmospheric features.
I also have an Orion Moon Filter. This is indispensable for glare reduction when attempting to look at the moon , which is incredibly bright (almost painfully so in fact) when viewed without the filter in place. [I would predict that a variable polarising filter would work better, allowing the optimal amount of filtering to be set for the lunar phase and lunar feature being observed]
I haven't tried using a Broadband or Narrowband Nebular filter at all.
Since 2004 I also have a set of 1.1/4" Clear and RGB filters and a set of 1.1/4" UBVRI filters for use with a colour wheel for CCD Imaging. I will typically work with one of the following filter wheel carousel setups :
1) Clear, 2) Red, 3) Green, 4) Blue, 5) Moon Filter
1) Clear, 2) B-Band, 3) V-band, 4) R-band, 5) I-Band
1) Custom Scientific 1.25" RGBC 4 filter set
RGBC
Product
Page
2) Custom Scientific 1.25" UBVRI Photometric Filters (Product Page)
7 new filters were bought at the end of 2014/beginning of 2015:
1.25" Johnson/Cousins Photometric Filters by Astroden
B, V,
Rc, Ic
1.25" 1.5% transmission Neutral Density Filter, by Baader
Nd
1.25" Star Analyser 200 Spectral Filter, by Paton Hawksley
S
1.25" Blue Blocking Exoplanet Transit Filter (XOP-BB), by
Astroden
Xo
The photometric filters replace my existing set of BVRI filters which over the years have become degraded due to ingress of humidity into the filter material. The SA200 spectral filter replaces by existing SA100 filter and will be provide spectral images that are better optimised to the focal length of my 12" LX200 telescope. The Blue-Blocking filter is designed to give improved accuracy of exoplanet transit measurements by reducing the impact of BV colour difference between exoplanet star and comparison star which can be a significant source of noise as the starfield changes in altitude. The 1.5% neutral density is designed to faciliate imaging of the moon.
The filters were installed into CFW10 filter wheel on 2015-03-05 ahead of session S581
Back to Top
I purchased a Meade F/6.3 Tfocal reducer (teleconvertor) at the same time as my 8" LX200 telescope. I didn't often use it for visual observing, though when I did it performed very well for viewing extended sky objects like open clusters and the milky-way.
After getting my JMI NGS-S focuser, using the F/6.3 focal reducer entailed taking off the JMI focuser, which meant that I would tend to not use it or positioning it after the diagonal (I need to check it again but I believe that the Focuser tube could 'crash' into the F6.3 Focal Reducer Lens if they placed next to each other.
I began CCD imaging with telescope set up in original focal ratio of F/10, however over time I tended to use the telescope almost exclusively with F/6.3 focal reducer in order to obtain a larger field of view thereby increasing my chance of having sufficient stars in view to achieve plate solution/linking in areas away from the milky way.
Back to Top
In early 2009 I purchased a Ted Agos Universal Adapter Tube fitted with an Antares focal reducer. This will become a main part of my new imaging setup from 2009 onwards.
The advantages of the Adapter tube are several
Potential issues arising when using the Adapter tube :
Links: | Ted Agos Universal
Focal Reducer Solution |
Focal Reducer
Notes | Links: |
Antares Optical |
Back to Top
This is an additional add-on to my system. More information will be added in due course when I develop some experience with it.
The AO-8 is adaptive optics systems from SBIG specifically designed to "enable
an SBIG camera user to obtain the ultimate in image resolution that his/her
telescope and site can achieve". The AO-8 system uses a tip-tilt transmissive
element to correct for image wander due to low order local atmospheric effects
and for correction of mount errors, wind vibration and other erratic motion
of the optical system that is otherwise too fast for an autoguider or telescope
drive corrector to respond to effectively. By monitoring a guide star with
the smaller tracking CCD that is built-in to SBIG ST-series cameras, or
a Remote Guide Head, the AO makes fine corrections at approximately 10 times
per second to hold the image fixed on the CCD during the exposure.
The AO-8 system take up far less backfocus than the former AO-7 which
required 3.5 inches of backfocus and also placed the camera at right
angles to the optical system. The frequency of corrections is
however lower with the AO-8 (~10/sec, compared to ~30/sec).
Links: | SBIG |
AO-8 Product Page | AO-8
User Manual | User Groups/Forums
: | SBIG
yahoo group |
Back to Top
This Barlow is new and was purchased in 2000 with the aim for varying the magnification power of existing eyepiece lens and for using in combination with 13.8mm Super Wide Angle eyepiece in particular. I will add more comments as I gain more experience with it.
Back to Top
I have an Orion Teleextender which I have used on occasions for taking photos through the LX200.
My first attempts of using the Teleextender where for taking pictures of Mars, M31 Galaxy, M42 Nebula and the Moon. The attempts were frustrating and none of the picture results where very good. I put this down to poor alignment, (I was using Tripod based Alt-Azimuth alignment in those early days), poor telescope stability, the severe image shift on Meade focuser and lack of experience. My experience taking photos is still fairly limited, but now that my scope is permanently installed on a pier, and consequently more stable and more reliably aligned I got better results.
I still occasionally use the tele-exender in combination with my CCD camera, when taking close up images of planets. This is often also in combination with eyepiece projection.
Back to Top
Back to Top
Back to Top
I have a Camera Mount on the top of the LX200 which I can attach my 35mm Pentax Camera too. I've used it for taking tracked photos of the night sky. Photos of Hale Bopp are the best photos I've taken so far using it.
Back to Top
I have the following eyepieces : 26mm, 9.7mm , 9mm Illuminated Reticule and a 13.8mm superwide, which I used extensively until 2003. Since then I use a CCD Camera for practically all my astronomical observations, the eyepieces are now hardly ever used, except for when using eyepiece projection and teleextender for taking closeup shots of planets.
Meade 26 mm Plossel 4000 series (1.25")
This is my main 'workhorse' eyepiece, and came with my LX200 when I bought it in 1995. It carries the odd scare from when it was once dropped onto concrete paving. However it still performs reasonably well, but it tends to show show glaring sometimes.
Meade 9.7 mm Plossel 4000 series (1.25")
I used to use this eyepiece for higher magnification work on double stars and planets. I don't particularly like this eyepiece as I find the ocular size too small. A larger angle of view would help or a lower mag eyepiece in conjunction with a Barlow lens (see 13.8mm Super Wide Angle below).
Orion 9mm Illuminated Reticule (1.25")
This eyepiece works well. The illuminated reticule is battery operated and is controlled by a switch on the end of the battery-containing side pod. Whilst it is not par-focal with my other eyepieces I like the reticule shape and find the additional refocusing an acceptable limitation.
Meade 13.8mm Super Wide Angle, Plossel 4000 series (1.25")
This eyepiece is fairly new (2000) and was purchased in 2000 with aim of adding a lens with reasonable high magnification (x145 for 8"/f10 LX200) but retaining reasonable eye relief. Combined with Barlow lens it provides a better combination than the 9.7mm lens alone. I've used it in combination with my teleextender for close -up shots of planets.
Meade 26mm Eyepiece (Series 5000) 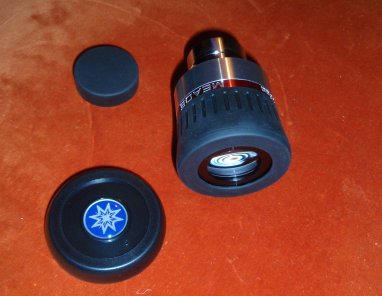
Back to Top
This diagonal came with the LX200 telescope in 1995. I tended not to use the 2" diagonal much, preferring instead my 1.1/4" diagonal. I tried the 2" again in 2000 and concluded that it gave no obvious optical benefits (none that I could easily perceive) and in fact had several practical disadvantages :
Back to Top
After using a 2" diagonal for a while, I purchased a 1.1/4" diagonal in 1996 for its compact size, which permits operation with the JMI focuser when aligning on Polaris or viewing any objects north of Dec 76 deg.
I subsequently used the 1.1/4" diagonal almost exclusively for visual observing between 1996 and 2000 and the 2" diagonal was left sitting in its box. Since moving to CCD imaging I no longer used a diagonal.
Back to Top
| Meade 2" Star Diagonal (Series 5000) |
|
Back to Top
Back to Top
I purchased my Telrad sight in April 1996 and have since found it to be an indispensable tool for quickly bringing the telescope to bear on alignment stars. I used to have my Telrad fitted on the lower surface of the LX200's tube, however it has now moved to the upper right surface of the LX200 due to installation of a 3D counterweight system below the tube.
The Telrad is highly practical and comfortable to use. With the eye(s) someway distant from the device it is easy to move the telescope so that an object or star is brought to the centre of the Telrad's sight. The smallest circle is 1/2 deg in diameter and guarantees that the object/star is placed within view of 26 mm eyepiece, though not necessarily within the view of my 9mm reticule eyepiece.
In certain telescope positions, the Telrad - as positioned on my telescope - does not permit sighting of object/star (e.g. this occurs when looking at Polaris at some times of the year, directly overhead objects/stars and objects in NNW or N sky ). These occasions are relatively rare and I then switch over to using the Meade Finder. A Telrad positioned on the upper surface of the tube would also suffer restricted viewing in certain telescope positions.
Even nowadays with CCD imaging I use the Telrad at the very start of each session in order to align the telescope on a bright star. The Telrad is sufficienctly well aligned with my scope that I can place a bright star onto a 16 x 11 arc min field of view of my CCD camera nearly every time.
Back to Top
This is a black plastic sheet which folds into a cylinder and is secured with Veco, whereupon it can be fitted to the front of the telescope tube.
I fit it at the start of each observing session and it works fairly well in keeping dew off the LX200's front corrector plate. However whilst it certainly defers the onset of dew formation on the front lens, it is not a cure for dew - it can still end up terminating an observing session.
The black sheet is very shiny on the inside, which probably means it could have the unwanted effect of capturing unwanted light.
Back to Top
This pen has a built in light just behind the tip of the pen. I haven't used it for some time. (I can't remember why - as the pen performed ok in the first year I had it - it might be that the pen has run out of ink, however it may be due to my preference to use pencil rather than pen).
Back to Top
I purchased the astronomical software package called TheSky Level IV (vn5) in 1999 and have it installed on my home PC and on my laptop.
I currently use TheSky for preparing sky charts and examining past/future events. I used it for helping to locate the Asteroid Amphitrite and later on Herculina, Hebe & Irene
I've having begun using it for controlling the LX200 in the observatory since mid 2001 and have just begun using it in conjunction with CCDSoft for doing CCD Imaging - see Future Steps & CCD Imaging.
Back to Top
I bought a Compaq Presairo 1700 laptop in 2001 and combined with TheSky software I now use it in the observatory for controlling the LX200. I take the laptop out to the observatory each session. Setting up the laptop merely involves plugging in 2 USB cables (mouse and USB-Serial adapter) and switching on.
The Compaq doesn't have its own serial port, instead I use a Belkin USB Serial Adapter. The adapter stays in the observatory and connects to an RS-232 cable which runs beneath the observatory floor, up the pier to the LX200. All I need to do is plug the USB cable into the laptop (this by the way is slight easier to do in the dark than a serial cable).
[ I initially bought a Belkin combined USB-Serial-Parallel Port Adapter, but returned it to the shop after finding that the Parallel Port doesn't allow true 2 way communication - and thus I wouldn't be able to use it with a CCD camera later on ]
Whilst I change the computer's colours to reds (via TheSky's Night Vision Mode), the LCD screen is still too bright and effects night vision & introduces excess light into the observatory whilst viewing. I have made a screen which uses red film filter to reduce this problem.
Back to Top
| Meade Ultra-Wedge sitting on pier | Ultra-Wedge showing Az. Adjustment Knob | |
|
|
|
|
| 12" LX200R Telescope mounted on wedge/pier | ||
 |
||
| 12" LX200R - Fork Base sitting on Wedge | ||
|
|
||
| 12" LX200R Scope in Observatory | ||
|
|
|
|
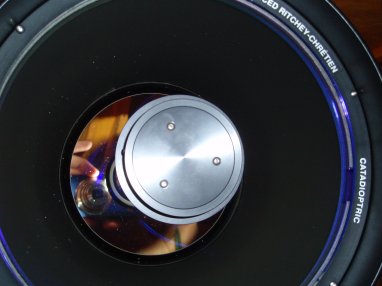
| 12" LX200R Scope showing roof clearance | 12" LX200R Mirrors & Baffle Tube | |
|
|
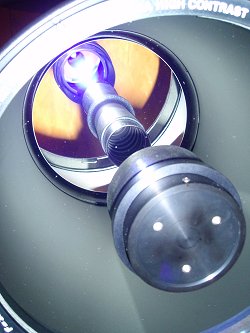 |
|
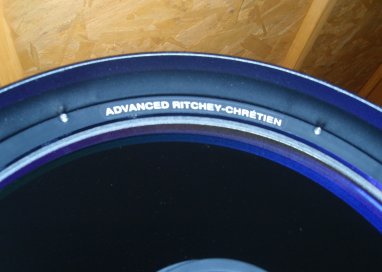
| 12" LX200R Mirrors & Baffle Tube | 12" LX200R with "Advanced Ritchey-Chretien"
labeling before Meade were required to remove it and re-brand the scope as LX200 ACF |
|
|
|
 |
|
| 12" LX200R with Dew Heater & Dew Shield | Balance Rail with weights | |
|
|
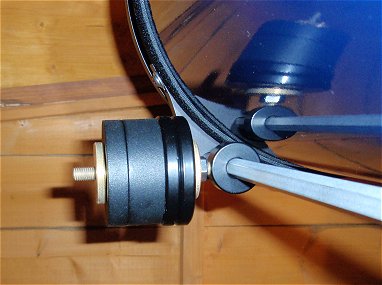 |
|
|
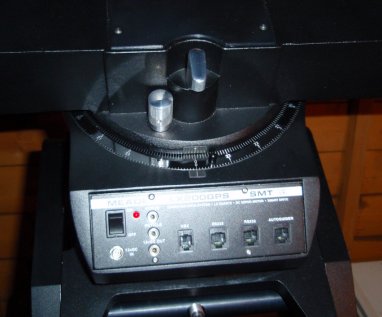
12" LX200R - GPS Reciever |
12" LX200R - Control Panel | |
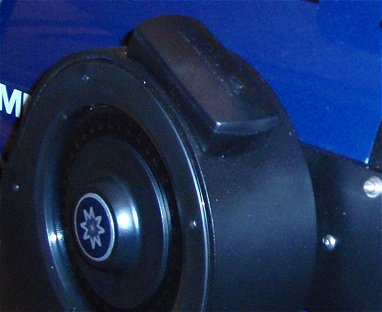
|
|
|
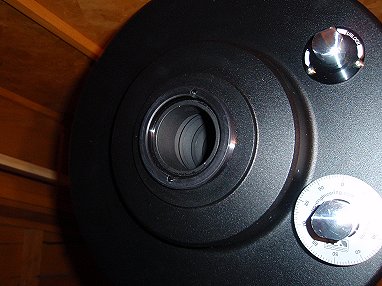
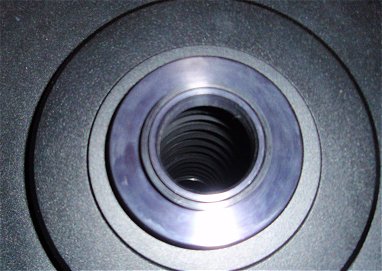
| 12" LX200R - Visual Back (open), also showing mirror lock and focusing knob |
12" LX200R - Visual Back (open) |
|
|
|
|
| Autostar II Hand Controller | 12" LX200R - / Ultra Wedge) | |
|
|
 |
|
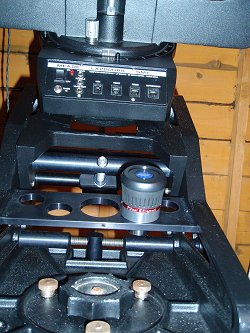
| 12" LX200R - Visual Setup | ||
|
||
Back to Top
| This Web Page: | Equipment |
| Last Updated : | 2015-05-15 |
| Site Owner : | David Richards |
| Home Page : | David's Astronomy Web Site |