David's Astronomy Pages
CCD
Imaging
Observatory
Use
Home
Page
Computer
Control
David's Astronomy Pages
|
Observatory Use |
Home Page |
Computer Control |

CCD Camera First Images Initial Teething Problems Experience & Comments Accessories Books UT/BST Times Imaging Practice See also
- CCD Imaging Performance 2001-09 to 2002-01 describing my first 4 months of CCD Imaging.
- Imaging Sessions for latest CCD Images look at my page.
- Scripting for information about my Telescope/CCD Image Scripting
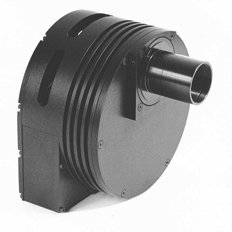
My CCD Camera is a ST-7E manufactured by SBIG (USA) and supplied via BCF in London. (picture of ST-7)
The ST-7 camera uses the KAF-400E CCD chip (765 x 510 pixels, with pixel dimension of 9 x 9 microns). A non-ABG camera was ordered, but it is currently suspected that the camera supplied is actually an ABG camera (details)
Camera control is performed via CCDSoft v5 program written by Software Bisque. The software was supplied with the camera.
[ Technical specification of ST-7
camera (at SBIG Website) ]
[
Technical
specification of CCDSoft v5 program (at Software Bisque Website) ]
Back to Top
Some of the first pictures taken with my ST7 camera are shown below. They don't really to justice to the capabilities of the ST7 camera, but they show my first achievements. For more recent images look at my Imaging Sessions page.
 |
First night - stellar imaging (images 2001-09-25) Double-Double in Lyra 2001-09-25, 23:16h UT (#2014) 8 secs exposure Due to poor focusing and/or poor seeing the binary components of each of the 2 main stars could not be resolved. Previously I've been able to resolve the binary components (See previous Visual View through eyepiece 1996). Subsequently, deconvolution was used to process the image and just resolve the pair of close binaries (notes 2001-09-25) |
| |
|
|
Second night - lunar imaging (images 2001-09-29) 2001-09-29, 21:36h UT 0.5 secs exposure (#4030) Due to high brightness of the near full moon, the aperture of telescope was stopped down to less than 2 inch. This limited the resolution achieved. |
| |
|
|
Third night - lunar imaging (images 2001-10-03) 2001-10-03, 23:01h UT 0.2 sec exposure (#5037) |
| |
|
|
Fourth night - deep sky imaging NGC 7331, Spiral galaxy in Deer Lick Group 2001-10-11, 20:49h UT 60 sec exposure (#6002) Stars imaged down to at least Mag +14.8 in this 60 second exposure. (previously Mag +12 was my visual limiting magnitude) Longer exposures started to show trailing/Pec wobble (I'm waiting on a replacement RC Adapter from SBIG to enable PEC training & autoguiding) |

 |
Fifth night - low resolution planetary imaging, Jupiter & Saturn 2001-10-31/2001-11-01 0.05 & 0.1 sec exposures, Unsharp masked (#8080 & 8043) Saturn - various exposures, various unsharp-mask processing |
Back to Top
Initial Teething problems and solutions are listed below
Problem : Focus control and @Focus not working from within CCDSoft although focus control working from within TheSky
Solution : Telescope / Server Settings modified in the TheSky to allow remote connections/allow focus control (solution originally provided to me by Software Bisque technical support )
Open TheSky.
Open menu item Telescope | Server Settings.
Click on 'Allow remote connections'
Then within the 'Remote client capabilities' section, click on 'Allow focus control'
Finally click on Ok
After this you small window that comes up called 'TheSky Server' which
contains a note indicating that Sky is 'Listening on port 9032'
Problem : Telescope running away in Declination when
ST7 is connected to LX200, making it impossible to keep a star image stationary
on the CCD chip
Temporary Workaround: Remove cable (Autoguider consequently
not available)
Solution: SBIG diagnosed a probable reverse wiring
problem with the RC-Adapter and sent a replacement by Airmail. This new
adapter fixed the problem.
Back to Top
CCDSoft
CCDSoft appears to be fully capable for acquiring CCD
images using the ST-7.
Some bugs noticed in 5.00.041
a) Problem
: Offset time field on the FITS Modifier form will not accept '-1'. Error given
as soon as '-' is entered. Workaround : Enter '1' first, then left arrow
and then enter '-'
Autosave/Image numbering
I use the Autosave facility in CCDSoft,
with an image numbering system with format, sssssnnn, where sssss records the imaging
session number and nnn records the consecutive images taken during the session.
eg 00006001 is the 1st image taken during the 6th observing session.
At the start of each session I set the Autosave Starting number to sssss001 (eg 6001) and the autosave folder to ../Ccd Imaging/New/yyyy-mm-dd/ where yyyy-mm-dd is the observing date.
Mechanical Connection to Scope
The standard connection provided
with ST-7 is a 1.1/4" nose piece. When connected into a 1.1/4" eyepiece
holder with a single thumb-screw, the ST-7 is in danger of falling out and/or slop.
I've now bought a #62 T-Adapter, which allows the ST-7 to be screwed securely
to a T-Thread. In practice I connect the ST-7 and T-Adapter to a Thread to 2"
nose adapter, which I insert into a JMI-NGF-S focusser and tighten with a pair
of thumb-screws.
An assessment of CCD Imaging Performance from my first 4 months use of the camera is documented. (CCD Imaging Performance 2001-09 to 2002-01)
CCD Operating Temperature
Graph showing CCD Operating
Temperatures used in SBIG through year.
(note SBIG 7e camera cools up o ~
30 deg below ambient)
Back to Top
The principal accessories associated with the CCD camera are
- 3D Counter
Weight system
- JMI NGF-S focusser controlled via CCDSoft and TheSky
Back to Top
Books that I own and have read on the subject are as follows
Choosing and Using a CCD Camera
by Richard Berry (Willmann-Bell,
Inc, 1992)
A practical, nuts and bolts kind of book with aim of helping the
reader decide if CCDs are for them, and then help them plan and execute successful
imaging sessions. This was my first book on the subject and helped me to decide
that I needed to get into CCD imaging one day.
The Art and Science of CCD Astronomy,
edited by David Ratledge
(Springer-Verlag London Ltd, 1996)
Describes the equipment, techniques and
solutions of 12 amateur astronomers with various CCD targets. One of the chapters
is by David Strange who belongs to the Wessex Astronomy Society.
A Practical Guide to CCD Astronomy
by Patrick Martinez and Alain
Klotz (Cambridge University Press, 1997)
Gives a clear description about
how CCD cameras work and what factors determine their performance. I found
Chapters 4 and 5 (Display and image analysis functions, Image Processing functions
) very useful and helped clarify to me how image processing works.
The New Astronomy
by Ron Wodaski (2001) (
http://www.newastro.com/)
A practical,
up to the minute description of modern amateur CCD imaging. Most useful
if you own a SBIG camera and use CCDSoft.
I've also borrowed and read the following book
Handbook of CCD Astronomy
by Steve B. Howell (Cambridge University
Press, 2000)
Describes the electronic workings of Charge-Couple Devices (CCDs).
Chapter 5 on photometry and astrometry useful. Last chapter about use of CCDs
in Space. More of a book for university students than the CCD amateur.
Back to Top
BST times are 1 hour greater than UT times
To analyse FITS images for a minor planet using CCDSoft/TheSky, times (TIME-OBS, DATE-OBS) must be in UT times.
CCDSoft's | Research | Analyse Folder of Images | FITS modifier | can
be used to correct BST times to UT times. Use Offset Time (hours)
of -1
(Need to be careful to apply change only once)
Back to Top
| Commencement of CCD Session | ||
|---|---|---|
| 1 | Create Folder Structure for storing New Images (performed using a script, which creates ../new/yyyy-mm-dd S000xx and ../analysis/yyyy-mm-dd S000xx folders (plus subfolders) where yyyy-mm-dd is the current date and S000xx is the session number. |
|
| 2 | Turn on CCD, connect to CCD and commence temperature regulation using CCDSoft | |
| 3 | Point CCDSoft's autosave folder to ../new/yyyy-mm-dd S000xx (ensure
Autosave is on) Set 'Starting number' to xx001 |
|
| Post Session | ||
| 1 | If computer times are in BST then use CCDSoft's FITS Header|Alter Time Keyword to convert BST times to UT times (offset hours = -1) | |
| 2 | Use own AstroImage Program to a) CleanUp filenames (removes the name suffixes, added by CCDSoft during imaging) b) Create FITS summary.dat listing (list of images, times, exposure length and type, image size/binning, target objects etc) |
|
| 3 | Copy raw images from ../new folder to ../_raw folder a) CleanUp filenames (removes the name suffixes, added by CCDSoft during imaging) b) Create FITS summary.dat listing (list of images, times, exposure length and type, image size/binning, target objects etc) |
|
| 4 | Open FITS Summary Template (Excel) Import FITS summary.dat file into Excel Save as 000xx_Fits_Summary.xls Check/adjust Object names and Bin/Exposure Group details. Run excel macro ColourCodeSheet. Save spreadsheet |
|
| 5 | If desired, use CCD Imaging Scripts to Analyse Raw Folder (to record pointing accuracy/FWHM etc) | |
| 6 | Run excel macro Group_Raw_Fits. This moves raw images into appropriate subfolders for reduction. | |
| 7 | Review & re-file Flat/Dark Files as required | |
| 8 | Use CCDSoft's Image Reduction to reduce each set of raw images. Output reduced files to .../_reduced folder | |
| 9 | If desired, use CCD Imaging Scripts to Analyse Reduced Folder (to record pointing accuracy/FWHM etc) | |
| 10 | Run excel macro Group_Reduced_Fits. This moves reduced images into appropriate subfolders for each object/bin/exposure set. | |
Back to Top
| This Web Page: | CCD Imaging |
| Last Updated : | 2015-05-15 |
| Site Owner : | David Richards |
| Home Page : | David's Astronomy Web Site |